
BlogBackcountryBackcountry Cooking Tips and Recipes to Get the Best Experience
Backcountry Cooking Tips and Recipes to Get the Best Experience

Emma Schroeder
Jan 20, 2026
You’ve just finished a long day of hiking and set up camp when your stomach starts to rumble. Flashes of burgers, fries, pizza, a rice bowl, chicken salad, and sushi pop up in your mind like a highlight reel, but then dread replaces the images of mouthwatering meals when you remember what you bought for dinner: plain rice with some canned tuna - and no spices.
Can we tell you a secret? Meals in the backcountry don’t need to be boring or plain. Instead, you can concoct delicious, fire-crisped delights! So, yes, it is possible to avoid mundane meals after burning thousands of calories. This article provides backcountry cooking tips and a list of recipes that brim with flavour!
Plan your meals before you go
Good meal planning can have a profound effect on not only your enjoyment of a backpacking trip, but also your group's impact on the backcountry as a whole. Remember to always follow the principles of Leave No Trace.
The key to eating well in the backcountry is preparation! The goal should be to make the actual cooking part as easy as possible. Decide your meals ahead of time and do your shopping a day or two before you leave.
Here are our tips to planning your meal:
- Don’t be afraid to use fresh foods. Freeze perishable items the night before and let them defrost in your pack. Fruits and vegetables can add weight but will turn a bland meal into a delicious and nutritious one.
- Don’t forget oil. Camp cookware is rarely non-stick, and it’s hard to cook without oil. Oil is also a good source of extra calories when you’re burning high amounts.
- Don’t overestimate how much food you’ll need. Cooked pasta or rice is a lot heavier to pack out than it is to pack in uncooked. You can’t leave cooked food at backcountry campgrounds as it attracts animals, which can be dangerous.
- If you don’t know what to cook, start with some of the backcountry staples, and build a recipe from there. Pasta, couscous, instant rice, sidekicks, tuna, pepperoni/jerky, dehydrated vegetables, oatmeal, powdered milk, dried fruit, nuts, chocolate can all be combined to make delicious meals.
- Bring along a treat. Candy or chocolate is a welcome delight on a cold wet trip. Hot chocolate can taste incredible while you are cozying up in a tent as it pours outside.
- It’s useful to test a recipe out at home first, especially if working with unfamiliar ingredients.
- Instant, freeze dried backpackers meals are a useful tool. If you get into camp late, or have to stay out another night, they’re a quick, easy, lightweight meal. Eating them for every meal can become expensive, and the flavours & textures can sometimes be hit & miss.
- Make sure you have the right stove to cook your meal in the backcountry. Here is a primer on how to choose a backcountry cooking stove.
Once you get the hang of planning, you’ll find you can enjoy the challenge of planning a delicious, nutritious meal in the backcountry!

Plan your meals and prepare your snacks in advance of the backpacking trip
Prep your food the night before
The night before (or earlier if you’re a planner), prep all your food. Good prep will make it easy to find, cook and eat your food when you’re backpacking. Here are our tips to making packing and eating your meals as easy as possible.
- Remove as much packaging as possible and store your food in ziplock bags. This not only reduces the amount of trash you’ll have to pack out, but works well to seal off leftover food, unhygienic waste – or even those crusty 3-day old socks! Ziplock bags can be stored inside each other and re-used later in the trip, or even at home.
- For liquids (oil, butter, sauce, etc), make sure to use screw top containers. Most gear shops sell a version of screw-top containers. In Canada, MEC has a good selection, like this one. If you want to reuse existing bottles, we have found that travel shampoo bottles, old medication containers, and mini alcohol bottles all work just as well. These are also great for condiments & spices.
- Another option for spices is to grab a handful of sachets of salt & pepper when you’re getting your next fast-food fix and keep these in your cook kit. You can also find hot sauce, ketchup, relish, honey – all in single serving packages!
- Pre-measure all the portions of food you’ll need for each meal, and pack dry food that will be cooked together in the same bag. For example, if your breakfast is going to be oatmeal with raisins & powdered milk for two days in a row, portion out two servings of oatmeal, raisins & milk into one ziplock bag. When it comes time to making breakfast, simply pour half the bag into your pot and cook away!
- If the meal comes with instructions, cut them out from the packaging and pop it in the bag with the food. Or, write the instructions on the bag. Then, package all elements of the meal together in one large ziplock, and write the day & meal on it – eg. “Monday dinner”. Have another bag for snacks, another for hot drinks, another for lunch. Before you head out on the trail each day, get your lunch & snacks for the day out, and place them somewhere easily accessible.
Don’t know what cooking gear to buy? Our article on packing and buying gear for a backpacking trip details some cooking equipment to look into!

Backcountry meal preparation tips
Recipes to amp up your backcountry meals
To help inspire you, below are a few of my favourite backcountry recipes. All these recipes are sized to two people.
Pesto, bacon & tomato pasta
This is an easy and delicious meal in the backcountry. It’s basically cooking some pasta and adding a few ingredients and stirring. So tasty!
Ingredients:
- Bacon
- Pasta (consider the quick-cook options so you don’t need as much gas)
- Pesto
- Sun-dried tomato
- Optional: grated parmesan cheese
- Optional: pine nuts
Before you leave:
- Cook four strips of bacon until crispy. Pat dry of excess oil. Store in ziplock bag.
- Measure 1-1.5 cups of dry pasta (penne or spirals packs best) & package in ziploc bag.
- Measure 4 tablespoons of pesto, store in a screw top container.
- Drain excess oil from around 200g of sun-dried tomatoes, store in a leak proof container.
- Optional: bring pine nuts and/or parmesan cheese to garnish.
At camp:
- Bring water to a boil, add salt & pasta, cook until al dente
- Drain pasta, leaving about a tablespoon of water in the pot. Add pesto and stir through.
- Crumble up bacon, add it and sundried tomatoes to pasta. Serve.
-
Garnish with pepper, pine nuts & parmesan cheese (optional)
Mexican rice & chicken
Another easy meal, it’s tasty and very filling. The lime juice is critical here, and juicing your lime at home saves a lot of weight both packing in and out! Because of the chicken, make this a meal on your first night backpacking!
Ingredients:
- Chicken breast
- Sidekick (or similar) Mexican Rice
- Chilli powder
- Lime juice
- Margarine/butter
- Oil
Before you leave:
- Dice a chicken breast (or can do at camp), package in ziplock bag, freeze.
- Squeeze out 3 tablespoons of lime juice, store in screw top container.
- Measure 3 tablespoons of chilli powder, store in screw top container or small ziplock bag
- Open a package of Knorr’s Sidekick Mexican Rice or similar product. Cut out the instructions from the back of the package, store rice & instructions in ziplock bag.
- Measure 2 tablespoons of margarine or butter, store in a small screw top container. (If it’s going to be hot on your trip you can freeze the margarine/butter as well to prevent it melting during the day).
- Bring oil in a small screw top container.
At camp:
- Prepare rice according to package instructions.
- Heat some oil in a pot.
- Add the chicken, cook until starting to brown.
- Add the lime juice & chilli powder, continue to cook until chicken is cooked through.
- Serve chicken & rice together.
Note: this is a first day dinner. To make this meal later in a trip, use canned or dehydrated chicken.
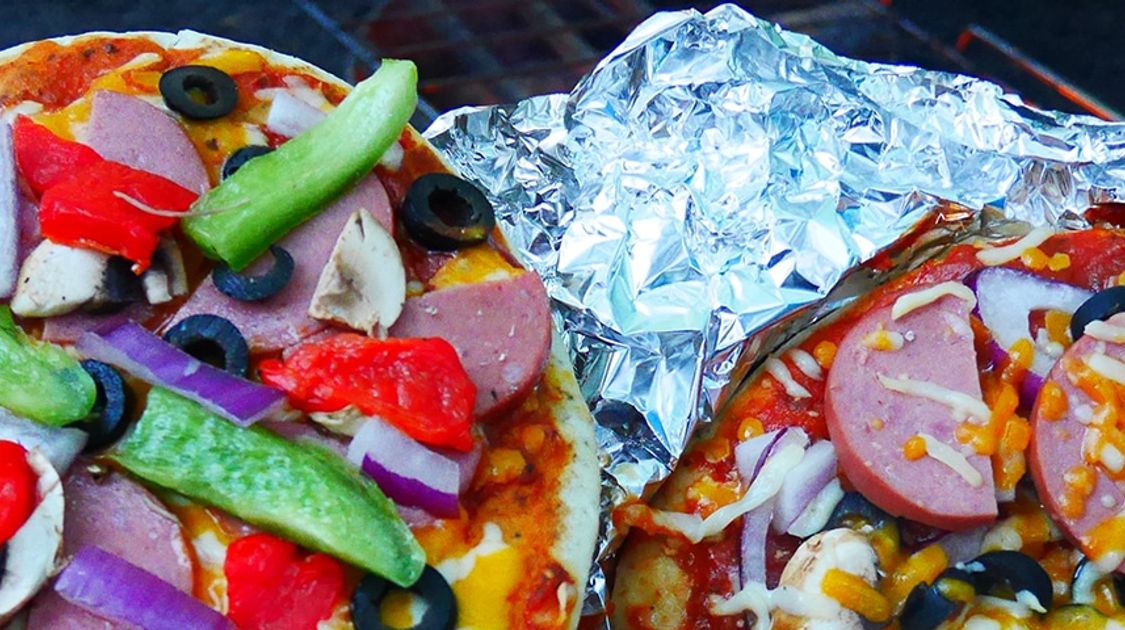
Campfire pizza
Amaze your friends by making pizza in the backcountry. This can be as elaborate as you want, with more toppings, fresh parmesan. We love bringing a bit of arugula and good olive oil for the top of the pizzas. Note that you’ll need a campfire to cook this one!
Ingredients:
- Pita bread/naan bread/pizza bases
- Pizza sauce
- Your favourite pizza toppings! Ones that keep well include:
- Red onion
- Green pepper
- Mushrooms
- Olives
- Salami/pepperoni
- Canned ham
- Anchovies
- Cheese (wow them with a blend of mozzarella, asiago, parmesan)
- Aluminum foil
Before you leave:
- Package your pizza bases in a ziplock bag. Keep the moisture/oxygen absorbing packet if it came with one, pack it too.
- Store the pizza sauce in a screw top container.
- Cut up your pizza toppings, store each one in individual ziplock bags
- Grate the cheese, store in ziplock bag.
- Bring plenty of aluminium foil, at least three sheets covering the size of the pizza base per pizza.
At camp:
- Start a campfire & wait for some coals & embers to get going.
- Spread pizza sauce on your pizza bases, add toppings & cheese.
- Make a packet of aluminum foil for each pizza – make sure there is an inch or so of space between the top of the pizza and the aluminum foil on top.
- Place pizzas on a grill over the campfire.
- Check pizzas after 10 & 20 minutes. It will take longer than cooking a regular pizza as heat is only coming from the bottom. When the cheese has melted, your pizzas are ready!
Note: This is a “heavier” meal, as in the ingredients are not really lightweight. It also makes use of some fresher ingredients. I’ve made this on day 2 on a canoe trip before, where weight did not matter as much – but it’s also great if you have a big group and a short hike.
This also requires a campfire. Remember to check that where you’re going allows campfires, and if firewood is available.

Tips for backcountry cooking include cooking pizza on the fire pit!
Tuna couscous
Monty Python had the famous line: ‘Nobody expects the Spanish Inquisition’. The same goes for Tuna Couscous. This meal is not one you’ll often find in the backcountry, however this delicious meal is healthy and is a great source of protein.
Ingredients:
- Tinned tuna (1 per person you’re serving)
- Chicken or vegetable stock powder
- Dried mixed vegetables
- Jalapeños (if you like spice!)
- Couscous
- Optional: slivered almonds
Before you leave:
- Measure out couscous into ziplock bag – 1/3 - 1/2 cup per person. Note on the bag how many cups are there. Couscous to water ratio is 1:1
- Mix in stock powder (one cube/tablespoon/package is good unless you’re making a huge serving)
- Mix in dried vegetables to your preferred veggie to couscous ratio
- Optional: dice jalapenos, store in ziplock bag.
At camp:
- Boil water - the same amount as couscous.
- Pour couscous mix into your pot, stir well.
- Let sit 10 minutes.
- Fluff with a fork, then mix in tuna and jalapenos (optional)
- Serve with pepper & slivered almonds (optional)
Pad Thai
This backcountry meal is a favourite. Pad Thai is delicious, nutritious and surprisingly easy.
Ingredients:
- Pad thai sauce (I like A Taste of Thai)
- Peanuts
- Rice noodles
- Powdered egg
- Scallions
- Canned, dehydrated or frozen chicken
- Crushed garlic
- Vegetable Oil
Before you leave:
- Remove excess packaging from pad thai sauce
- Crush up peanuts, store in a ziplock bag
- Portion out rice noodles (be conservative, rice noodles are swell a lot)
- Portion out 1 tablespoon of powdered egg, store in ziplock bag
- Chop up scallions, store in ziplock bag
At camp:
- Boil water, add rice noodles & cook for 3-5 mins or until soft. Drain & set aside.
- Cook chicken & crushed garlic in oil until chicken has browned.
- Add 3 tablespoons of water (or whatever the powdered egg instructions stated) to the powdered egg bag & mix.
- Add egg to the chicken & garlic and stir to cook eggs evenly.
- Add noodles, scallions & pad thai sauce to the chicken & egg. Stir through until everything is evenly coated & heated.
- Serve with crushed peanuts.
Breakfast Wrap
After a few days, the standard of porridge with berries can get pretty boring. This is a nice way to change breakfast up into something new and tasty.
Ingredients:
- Tortilla wrap
- Powdered egg
- Your favourite salsa
- Spinach (optional)
- Jalapeños (if you like spice!)
- Bacon jerky (optional)
- Dehydrated hash browns - these can be purchased, or you can dehydrate your own shredded potatoes.
- Vegetable Oil
Before you leave:
- Portion out hash browns, cut out or write instructions on ziplock bag.
- Portion out the powdered egg, seal in ziplock bag
- Store salsa in a screw top container (alternatively, pick up some single serve packets of salsa from fast food places like Taco Bell)
- Store spinach in a ziplock bag
At camp:
- Rehydrate the hash browns and fry in a little oil for 5 minutes.
- Add water to the powdered egg bag & mix well.
- Turn heat down, move hash browns to the side & cook egg, stirring frequently.
- Add eggs, hash browns, salsa, bacon jerky & spinach to the tortilla wrap & serve!
Bonus Recipe: Chocolate Fondue!
You will be everyone’s favourite person at camp when you whip this one out. This is great if you’re taking kids for a backcountry camping experience or you want to impress that someone special.
Ingredients:
- 250g block plain milk chocolate
- 250ml can evaporated milk (or if available, shelf stable UHT cream)
- Marshmallows
- Your choice of fruit - bananas and strawberries are great, but don’t keep very long. Apples & pears keep longer.
At camp:
- Break up chocolate & add to pot with evaporated milk
- Cook on low heat, stirring constantly. Don’t let the milk boil or burn. This can’t be done with a rapid-boil cooker.
- Chop up fruit into bite sized pieces.
- When the chocolate has fully melted and combined with the evaporated milk, grab your fork, dip the fruit & marshmallows in and enjoy!
This dessert serves AT LEAST four - consider halving or even quartering for smaller groups.
Backcountry campers need a lot of calories, especially if they are doing a long multi-day hike. That's why desserts and snacks are an important part of your wilderness diet.
If you don't want to go through the hassle of cooking your meals in the backcountry, check out these tasty meal ideas that don't require you to cook.
Lastly, if you're planning on a multi-day backpacking trip, you might want to consider bringing along dehydrated meals. This is a great option if you need to find a balance between weight, convenience and nutritional value. To find out more about this option, check out this guide to dehydrated backpacking food.
We hope this article helps you get out in the backcountry. Feel free to comment below and share your favourite meals.
Recent stories

Destinations
Japan Walking Tours: Best Regions, Hiking Trails and Trips for 2026
Japan is one of the best countries in Asia for travellers who want to combine walking, culture, food, history, and scenery in one trip.
Richard Campbell
May 13, 2026

Destinations
What to Pack for Machu Picchu in 2026
Deciding on what to pack for Machu Picchu can be a daunting experience, especially if you are unfamiliar with the geography, climate, and restrictions/regulations in Peru.
Alex Todd
May 12, 2026
Destinations
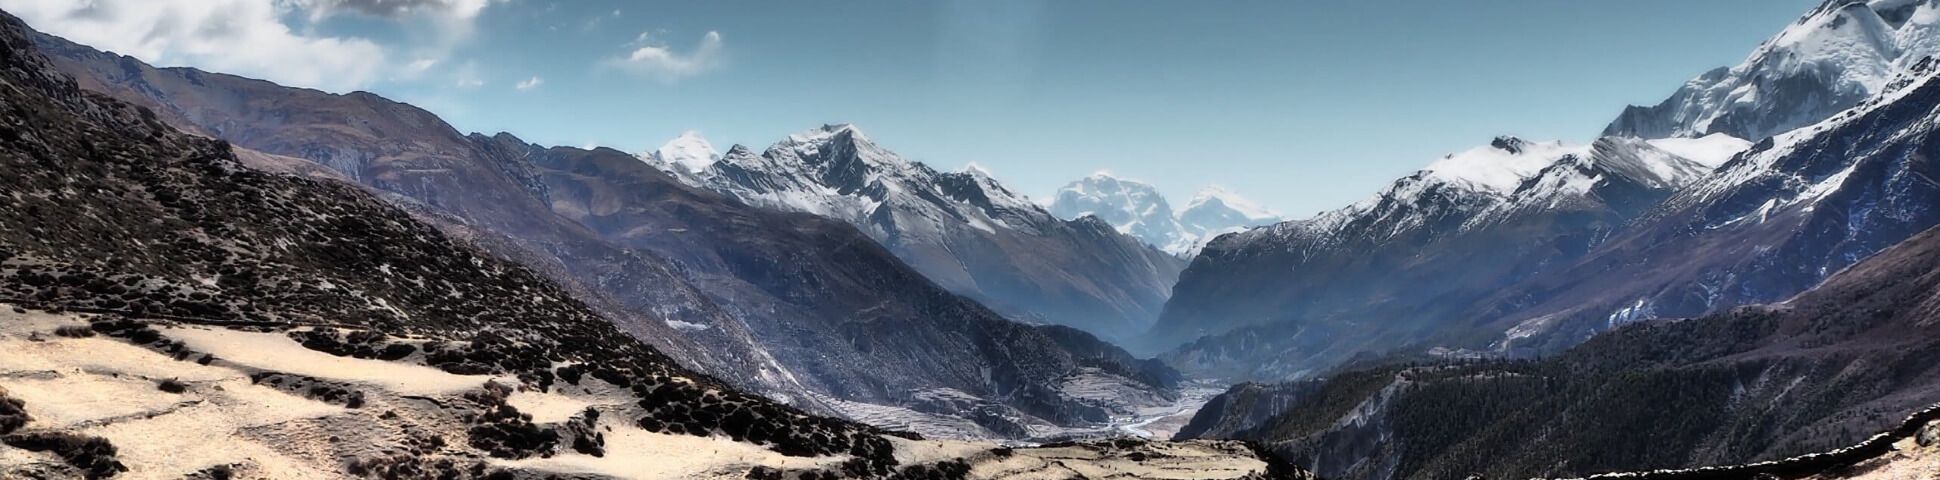
Annapurna Circuit Trek for 2026
Trade the everyday buzz for unfiltered, natural imagery along the inspiring, challenging Annapurna Circuit Trek.
Kelsey Krahn
May 12, 2026